1.28.2016

The Tastiest Thanksgiving Yet!

My immediate family decided to split up the responsibility for Thanksgiving this past year. It was a nice way to divide out the responsibility so that not just one person was so completely overwhelmed with duty. We couldn't quite escape that fully as my mom and sister rushed to get everything on the table at noon but we sat down to one of the tastiest Thanksgiving meals at promptly 12:18 p.m. Now that's pretty good!

Sadly, I didn't take any photos. Life with two littles makes that escape my mind more than I'd like to admit!

Here are some of our favorites from the day!

Drinks
Blushing Mimosas
  • 2 cups orange juice (not from concentrate)
  • 1 cup pineapple juice, chilled
  • 2 tablespoons grenadine
  • 1 bottle Champagne, chilled
Stir together first 3 ingredients.

Pour equal parts orange juice mixture and Champagne into Champagne flutes.


Side #1
Rolls

Photo courtesy of Bobby Flay during the "All American" episode of Boy Meets Grill
  • 1 1/2 cups milk
  • 1 stick unsalted butter, cut into pieces, plus more for brushing
  • 1/2 cup sugar
  • 1 package active dry yeast
  • 1/2 cup warm water
  • 3 large eggs, lightly beaten
  • 1 1/2 teaspoons salt
  • 6 cups all-purpose flour
Place milk in a small saucepan and bring to a simmer. Remove from the heat, stir in the butter and sugar and let cool. Dissolve yeast in warm water and let sit until foamy. Combine milk mixture, eggs, yeast, salt, and 1/2 of the flour in a mixer with the dough attachment and mix until smooth. Add the remaining flour, 1/2 cup at a time, and stir until a smooth ball forms.

Remove from the bowl and knead by hand on a floured surface for about 5 minutes. Place in greased bowl, cover, and let rise in a warm place until doubled in bulk, about 60 to 70 minutes. On a floured surface, punch down the dough and shape into desired shapes. Place on a parchment paper-lined baking sheet. Cover again and let rise until doubled, about 30 to 40 minutes.

Preheat the oven 350 degrees F.

Bake for about 20 minutes or until golden brown. Remove from the oven and brush with melted butter before serving.


Side #2
Creamy Mashed Potatoes
  • 5 lbs Russet Potatoes, peeled, cubed
  • 2 garlic cloves, minced
  • 1 1/2 cup chicken broth
  • 1/3 cup heavy cream
  • 1/4 cup butter, cubed
  • 1 1/4 cup lite sour cream
  • 1 teaspoon salt
  • 1/4 teaspoon pepper
  • 2 ounces cream cheese
Boil cubed potatoes until soft. Add in all the ingredients and mixed until well combined.


Photo Courtesy of Ree Drummond, the Pioneer Woman
  • 1 head (large) Broccoli
  • 1 head Cauliflower
  • 6 Tablespoons Butter
  • 1/2 whole Medium Onion, Diced
  • 2 cloves Garlic, Minced
  • 1/4 cup Flour
  • 2-1/2 cups Low Sodium Chicken Broth
  • 4 ounces, weight Cream Cheese, Room Temperature
  • 1/4 teaspoon Salt
  • 1/2 teaspoon Black Pepper
  • 1/4 teaspoon Seasoned Salt, More To Taste
  • 1/4 teaspoon Paprika
  • 1-1/2 cup Grated Monterey Jack Cheese, More To Taste
  • 1 Tablespoon Butter
  • 1/3 cup Seasoned Breadcrumbs
Break the broccoli and cauliflower into small florets, cutting off the thick stalks as you go. Steam them for 3 to 4 minutes until the broccoli is bright green, then remove them from the heat. Set aside.

In a large skillet, melt the 6 tablespoons of butter and saute the onion and garlic until the onion starts to turn translucent, about 3-4 minutes. Sprinkle the flour over the top, whisk to combine, and cook for another 45 seconds. Pour in broth, whisking constantly, then cook until the sauce thickens. Reduce the heat to low and add the softened cream cheese, salt, pepper, seasoned salt, and paprika. Stir to combine until the sauce is nice and smooth. Taste and adjust seasonings, making sure it's nice and flavorful! Keep warm.

In a small bowl, stir together the breadcrumbs and melted butter. Set aside.

Layer half the broccoli and cauliflower in a small casserole dish. Pour on half the cream sauce, then sprinkle on half the cheese. Sprinkle a little paprika on the cheese, then repeat with another layer of broccoli, sauce, and cheese.

End with a sprinkling of breadcrumbs. Bake in a 375 degree oven for 25-30 minutes, until cheese is melted and bubbly and the breadcrumbs are golden brown. Serve warm.


The Main Event

Turkey using My Favorite Turkey Brine

  • 2 gallons cold water
  • 3 cups apple cider
  • 2 cups packed brown sugar
  • 3/4 cup kosher salt
  • 3 tablespoons tricolor peppercorns
  • 5 whole bay leaves
  • 5 cloves garlic, minced
  • Peel of 3 large oranges, cut into large strips
  • 4 fresh rosemary sprigs, leaves stripped off
  • 1 uncooked fresh turkey
Combine the water, cider, brown sugar, salt, peppercorns, bay leaves, garlic, orange strips and rosemary leaves in a large pot. Stir until the salt and sugar dissolve. Bring to a boil, and then turn off the heat and cover. Allow to cool completely, and then place into the fridge to chill.

Place an uncooked, fresh turkey in the chilled brine solution, and then refrigerate for 16 to 24 hours. (You may add more cold water if you need more liquid for the size of turkey you have.)

When you're ready to roast the turkey, remove the turkey from the brine. Submerge the turkey in a pot or sink of fresh, cold water. Allow to sit in the clean water for 15 to 20 minutes to remove excess salt from the outside. Discard the brine.

Remove the turkey from the water, and then rinse again, pat dry and cook according to your normal roasting method.

1.25.2016

Bathroom Remodel {3} - The tale of two toilets!

If you aren't already super annoyed by my endless photos of babies and food, then you've probably noticed we FINALLY started our bathroom remodels that we've been talking about for years. Don't believe me? Check out these old posts, Bathroom Remodel Styleboard from January 2014 and Bathroom Remodel {1}: Styleboard Update from January 2015. I thought it pretty fitting that I do another update in January 2016 about how far we've come. As I had hoped, 2015 was an incredible year!

I honestly cannot believe we're at this point, nearly finished with all the bathroom projects we wanted to complete to update this house. We started talking to who we contracted with to work on our house back in late April. Work began near the end of July and with a few breaks here and there, we're almost done! A few (okay, quite a bit of) things are left to be completed but that will happen soon enough. My guess is that it'll be closer to 2017 ;-)

This will be one loooooonnngg post with lots of photos but it will give you all a fun glimpse of what we've endured for the past six months. I'm so in love with all the new spaces and cannot wait to make them our own very soon.

I'll start by saying that I am so glad we contracted out the work. There is no way this could have been done because of our crazy schedules and having two littles. I.M.P.O.S.S.I.B.L.E. Okay, not totally impossible, but let's be real. Who could have a project like this completed in 2-3 months while working 70+ hours a week, caring for two littles and not getting great sleep ever? I'm happy to pay someone else to do the work and have it completed in a rather short period of time. I can live in shambles for a while. No problems there.


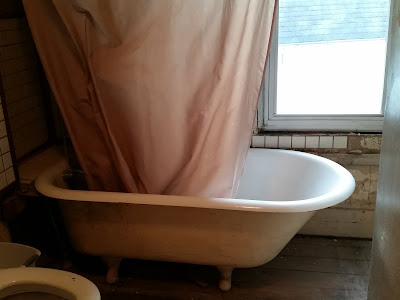
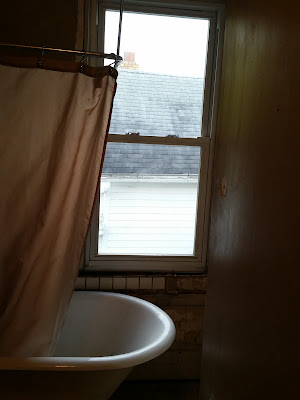
Here is what we started with regarding the downstairs. This was a wasted space for us - mostly used for storage since we moved in back in June 2012. That stuff made it's way to the basement and work began on July 20. It took a couple of days to demo the space because there was a bit more of ceiling material to deal with but I was really excited to see that progress to something completely different so quickly.


As you can see from the first photos to the second set, we raised the ceiling and opened up the doorway to this room. I have to admit, that might be one of the most exciting changes! Being pregnant and having to take dirty clothes to the basement was a struggle. I had that tiny doorway to go through and then the tiny basement door to go through and very narrow steps to walk down. One less obstacle in the way is greatly appreciated. By the end of day two, we had the new space framed up!


The new space is now our downstairs half bath. Over the next few days, we had the electrician and plumber do their thing. Seeing a bunch of holes and wires all over was pretty exciting but completely enticing for Peach Pickles. He's more of a trouble maker than Owen!



By the end of week one, we had a newly framed up half bath, lost access from our kitchen (A Okay with me!) and a leveled floor. As you can see with that last photo, the space wasn't accessible for about 2.5 weeks as we waited for our bath tub to arrive. Unfortunately, we couldn't start on the upstairs until that arrived and this created a couple of interesting issues for us to deal with during that time. For one, the upstairs plumbing was getting switched from the cast iron to the more updated plastic pipes. Of course, without the new tub, that portion had to wait. As most old showers do, ours leaked. Leaked a lot. Leaked a lot onto the floor below that never fully dried up. Oops. Travis had to redo that work when they started up again. Oh well. Secondly, the holes. Peaches would have literally fallen down to the basement had we left him to roam about. Not going to happen on our watch! Poor Peaches was sequestered to the 2nd floor for 2.5 weeks. How did we manage that, you ask? I forgot in the 2.5 weeks to take a picture of this but we put up two baby gates! We had to climb through the bottom gate to get to the stairs. The top one had to be there because our fearless cat figured out how to jump over the height of one baby gate and still does to this day. Let me tell you, having to crawl though a baby gate really sucked, especially in the middle of the night!

When the bath tub arrived, work began again and went pretty quickly in both spaces.


Downstairs
leveling fixed, flooring installed
door installed
master bath plumbing pipes replaced, then sheetrocked (you'll see this later when all the pipes were replaced)


Upstairs
master bedroom, nursery, bathroom doors replaced!
partial demo of bathroom

All in a day's work, right? 


The next few days brought even more excitement. The master bathroom pipes were fully updated, the downstairs toilet was installed, the new bathtub was installed and the window replaced. What's even better, they also replaced the outside siding that very same day. 


Once everything was in place, TILE was installed!!!!!!!! Now that was an exciting day :) I should mention that while we were in this stretch of the remodel, we showered a little less often than normal... A few weeks went by without an updated photo but we only had to wait a week or so before we could use our own shower again. Isn't it beautiful?


The next step in the renovation was the prep the walls for painting. It took a few days for this to be completed and we had a hard time keeping the kids' toys out of there! But soon enough, we got to paint! Let me rephrase that, I got to paint. Gspice is no longer a willing painting participant. I'll deal with that but man it take me a long time to paint by myself!


Here is where we have been for the past few months. The downstairs needs ceiling paint and a few other details added like outlet covers, vanity lights, faucet, mirror, etc. The doors still need paint and the upstairs bathroom needs a second coat. This is honestly the only photo we've taken of the upstairs since we painted! Owen was just too cute :) Eventually we'll make the last handful of updates but like I said before, you'll probably see those January 2017.

BUT AT LEAST WE HAVE TWO TOILETS!!!!!!!!!!!!!!!!!!!!!!!!!!!!!!!!!!!!!!!!!!!!!!!!!!!!!!!!!!!!!!!!!!

1.10.2016

Baby Jack {10 Months}

Jack is ten months old and is as sweet as could be. He is pretty chill and relaxed most of the time and goes with the flow. He eats pretty much anything and even if he doesn't feel too well, Jack is all smiles and plays like normal. It's really interesting to have such a easy going baby. I thought Owen was but my word, no he was not!

The biggest development of the past month................................JACK IS SLEEPING THROUGH THE NIGHT!!!!!!!!!!!!!!!!!!!!!!!!!!!!!!!!!!!!!!!!!!!!!!!!!!!!!!!!!!!!!!!!!!!!!!!!!!!!!!!!!!!!!!!!!!!!!!!!!!!!!!!!!!!!

I can't tell you the exact day it happened but it did. The boys started sharing a room on December 13 and it went really well from the get-go. They both fell asleep within minutes and though Jack would wake up at some point in the night for a week or two, Owen didn't care. He'd sometimes wake up but never made a peep or fuss about it. It's been W.O.N.D.E.R.F.U.L. to have two sleeping babies from 7-7:30 p.m. to 7-7:30 a.m.

Baby Jack also got a second top tooth as well. We haven't seen any since but does that stop the nibbling? Of course not. Jack still puts just about anything in his mouth. Thankfully he hasn't gotten his hands on too many books yet. Owen still takes care of those.

Crawling and walking are still nowhere to be seen. I'm convinced though that he'll go straight to walking. He won't figure out how to crawl until later if he ever does. Jack still army crawls with a vengeance and now pulls himself up onto objects - chairs, the couch, ottoman, totes, my legs, you name it.

10-Month Mommy Guesses
Weight: 19 lb 7 oz
Height: 27.75 in


9-Month Appointment (12/7/2015)
Weight: 19 lbs
Height: 27.25 in

8-Month Mommy Guesses (I have no clue so these are legit guesses!)


Weight: 18 lbs 12 oz
Height: 27 in

7-Month Mommy Guesses (I have no clue so these are legit guesses!)

Weight: 18 lbs 3 oz
Height: 26.75 in

6-Month Appointment (9/8/2015)
Weight: 17 lbs 6 oz
Height: 26.5 in

5-Month Mommy Guesses

Weight: 16 lbs 1 oz
Height: 26.25 in

4-Month Appointment (7/7/2015)
Weight: 14 lbs 13 oz
Height: 25.75 in

3-Month Mommy Guesses
Weight: 13 lbs 9 oz
Height: 24.25 in

2-Month Appointment (5/8/2015)

Weight: 12 lb
Height: 23.75 in

Mommy-wants-a-weight-check-kinda-visit (5/1/2015)

Weight: 11 lb 9 oz

Add'l Doctor Visit (4/16/2015)
Weight: 11 lb 

2-Week Appointment (3/26/2015)

Weight: 9 lb 8 oz
Height: 21.5 in

Newborn (3/6/2015)                  
Weight: 8 lb 14 oz           
Height: 21.5 in