Showing posts with label pinteresting. Show all posts

12.22.2018

What's for Dinner {46} - Slow Cooker Beef Stroganoff

Most who know me know that I love a good red sauce for my pastas. It was time to select what I was going to make for the annual Pasta Night for students staying over break and I decided it was time for a change. As I searched for crockpot recipes, this one stood out immediately. I'm so glad I decided to try it - I can still smell the wondrous aroma coming from the crockpot as this cooked for eight hours of my workday last Monday.

The boys were able to stop by for a hot second but didn't end up staying too long. They got to try a lot of the different pastas available but sadly, the boys didn't seem to like mine too much, nor did Gspice. I'm just going to blame that on him not feeling so well because I really liked it. I'm also guessing the color didn't appease them like a normal red sauce might. However, it made excellent left overs so I can still make it for myself :) The best part of the night though was definitely the RAs washing all of the dishes!


Next time I make this, I may try to leave out the cream cheese to see how that works for the recipe. It was super creamy and delicious but without it would make it a bit more healthy! As we gear up for a fun holiday season and the coldness it brings, be sure to add this recipe to your menu planning!


Slow Cooker Beef Stroganoff from Creme de la Crumb


  • 1 1/2 - 2 lb  stew meat
  • 2 t Italian seasoning
  • salt and pepper, to taste (I used about 1 teaspoon salt and ½ teaspoon black pepper)
  • 2 c beef broth (I used low sodium)
  • 1 c sliced mushrooms (I of course left this out!)
  • 3 T Worcestershire sauce
  • 1 T minced garlic
  • 1 T dijon mustard
  • 1 c sour cream
  • 6 oz cream cheese, cut into 1-inch cubes, softened
  • 4 T corn starch (or flour) + 1/2 cup beef broth
  • 12 ounces short pasta noodles, cooked according to package instructions (egg noodles are traditionally served with stroganoff but penne, macaroni, or spiral all work well)

Instructions

  1. Lightly grease your slow cooker, then add stew meat and sprinkle Italian seasoning, and salt and pepper to taste over the top. Add mushrooms, beef broth, garlic, Dijon mustard, and worcestershire sauce. Cover and cook on low for 8-9 hours.
  2. About 30 minutes before serving, stir corn starch (or flour) into 1/2 cup beef broth and stir mixture into slow cooker. Add cream cheese and sour cream to slow cooker then cook another 20-30 minutes on high, stirring occasionally until cream cheese and sour cream are incorporated and sauce is thickened. 
  3. Taste, add salt and pepper to your personal taste if needed, and stir in noodles. Serve immediately garnished with cracked black pepper and fresh thyme if desired.

    **This recipe makes great leftovers!

If you would like to see previous recipes that I have made for this event, check out the recipes below!

2017


10.04.2018

What's For Dinner {45} - Detox Immune-Boosting Chicken Soup

Well hey there! It's certainly been more than a hot second since I last posted but this recipe brought me out of the rut! Along with how easy this was to make, it's going to be on my mind quite a bit with the cold weather that is coming our way.

I've been talking with Gspice for some time now about how I wanted to try my hand at soups. I know you know that I don't make soups very often at all and now after making this one and now the one I'll be sharing today, I'm not really sure why. I made it a commitment to try out some new recipes, all broth-based. For some reason, broth-based soups sound e.x.t.r.e.m.e.l.y. appealing to me plus they are most certainly healthier for you! This soup would be a great addition to your fall/winter meal plans to beat the cold/flu season that is coming upon us. I also really liked the warmth/heat this soup brings to the palate so hopefully you'll like that too!


I made this recipe with a few tweaks which I will note in the ingredients/steps below and there are certainly things you could do with this that even I didn't. I made this to be Whole30 compliant but you could add in a small shaped pasta too which the original recipe doesn't call for. Without further adieu - here is the recipe!


Detox Immune-Boosting Chicken Soup adapted from Eat Yourself Skinny


  • 2 T extra virgin olive oil
  • 1 yellow onion, chopped
  • 3 large celery stalks, chopped (I used 2)
  • 2 large carrots, peeled and chopped (I used 3, I think you can tell which one I like better!)
  • 10 cloves garlic, minced
  • 8 cups chicken stock
  • 2 bay leaves
  • ½ tsp. turmeric
  • ½ tsp. crushed red pepper
  • 1½ tsp. sea salt
  • 3 cups shredded rotisserie chicken
  • 2 cups baby kale leaves
  • I also added black pepper which I read aids absorption

**This original recipe calls for 1 cup mushrooms and 1-15oz can of chickpeas but I did not include those products in the soup I made.


In a large pot or dutch oven, heat oil over medium-high heat and sauté onion, celery and carrots, stirring occasionally, about 5 minutes. Add garlic, cooking another 3 minutes.

Seriously, look at this garlic!!! I LOVE that this recipe used so much!

Stir in the chicken stock, bay leaves, turmeric, crushed red pepper, salt and pepper; bringing to a boil. Mix in shredded chicken, cover and turn down heat to a simmer for 15 to 20 minutes.

Add kale, cover and simmer an additional 5 minutes. Discard bay leaves, serve and enjoy!


I prepped these for my lunches for the week and paired it with a small lettuce salad with cucumbers and green olives. I topped that with a bit of Tessemae's Habanero Ranch. If you are a fan of a little spice (or a lot like me), you HAVE to try this. Not only is it Whole30 approved, which means that it is dairy free, gluten free, soy free and sugar free....it tastes amazing! They have a ton of other products on their website too so if you are looking for healthier alternatives for dressings, marinades or salad kits, CHECK THEM OUT!

I saved the rest of the soup and put it in the freezer. When I decide to pull it out, I'll let you know how it is to see if it's a suitable freezer meal!

Also, I used these glass containers if you are interested. I did have some seepage into my salad if I didn't hold my bag perfectly flat while walking to work so maybe wouldn't recommend them for carrying soup but this could be really good if you like to separate out your food!

12.22.2015

What's for Dinner {37} - One Pot Red Pepper Sausage Alfredo with Marscarpone

Luther hosts a pasta night for students staying over break. We bring 6-8 pasta dishes, a bunch of garlic bread, salad and drinks. Best night ever? I was really excited when I heard about this because you all know of my love for pasta. It took me FOREVER to come up with a recipe but I found one yesterday that I just had to try.

For one, it's a one pot meal. Those are the BEST kinds of recipes. I loathe washing dishes so this really reduces that chore. Secondly, red pepper and sausage. Done. I've become quite obsessed lately with red pepper flakes and also hot sausage. I can't get enough. Lastly, marscarpone. I was introduced to this recently and really wanted to give it a try in one of my own recipes.

Because I had never made this before, I didn't want the first time to be for a bunch of picky college students. So, I decided to make it at home! And holy cow, I'm so thankful I did. I didn't make any mistakes, it was just that good.

One Pot Red Pepper Sausage Alfredo adapted from Host the Toast
*I did change up the recipe a bit, but the recipe provided was a great starting point!

Ingredients
  • 1 lb Italian sausage
  • 4 cloves garlic, finely chopped
  • 1 tablespoon olive oil
  • 2 cups milk, plus ¼ cup for the sauce
  • 2 cups chicken broth, plus ¼ cup for the sauce
  • 1 (16 oz) jar roasted red peppers, drained and pureed (you can do this in a food processor or blender) - I CHOSE TO USE RED PEPPER FLAKES INSTEAD - I didn't want the extra work, but I may try that next time
  • 8 oz goat cheese - Walmart didn't have this so I grabbed marscarpone instead
  • ½ cup grated parmesan
  • Salt and pepper, to taste
  • 3 handfuls fresh spinach
  • 16 oz pasta of your choice
Directions
  1. In a large pot or high-walled pan, saute the sausage meat with the garlic and olive oil over medium heat, until browned.
  2. Stir in chicken broth, pureed roasted red pepper, milk and pasta. Season with salt and pepper, to taste. Bring to a boil; cover, reduce heat and simmer until pasta is cooked through, about 12-15 minutes. If the liquid has all been absorbed, add the additional milk and chicken broth.
  3. Stir in spinach, one handful at a time, and cook until wilted and hot.
  4. Stir in the marscarpone and parmesan. Continue to stir until melted. Remove from heat and serve.

I'm really excited for the pasta event tonight - I hope it goes over well and my guess is it will! We have a lot of pasta dishes in the works. I decided at the last second to buy ground turkey instead of hot sausage because there are a number of students who don't eat pork. Hopefully it's still just as good!

3.30.2015

Sweets & Treats {4} - Chocolate Chip Pumpkin Spice Bars

Gspice noticed we had a can of pumpkin puree sitting in our pantry the other day. He said we should make pumpkin bread and I promptly said, "You mean the pumpkin bars." We bickered back and forth a couple of times before he fully understood that I wasn't kidding.

I made these bars back in November so that Owen could have a fun pumpkin treat over Thanksgiving. He loved them!


And who knew I would become obsessed? It was literally one of the best pumpkin bars I had ever tasted. And even though it's now four months later, these bars would be tasty anytime of the year!

Chocolate Chip Pumpkin Spice Bars from the Recipe Girl

BATTER:
1 3/4 cups unsweetened pumpkin puree
1 cup canola or vegetable oil
4 large eggs
1 1/2 cups granulated white sugar
1/2 cup light brown sugar, packed
1 cup all-purpose flour
1 cup whole-wheat pastry flour
2 teaspoons baking powder
2 teaspoons ground cinnamon
1 teaspoon baking soda
1/2 teaspoon salt
1/2 teaspoon ground ginger
1/4 teaspoon ground cloves
3/4 cup mini- chocolate chips

FROSTING:
8 ounces cream cheese, at room temperature
4 Tablespoons butter, at room temperature
2 teaspoons milk
1 teaspoon pure vanilla extract
4 cups powdered sugar, measured then sifted
1/2 cup mini- chocolate chips (for topping)

Prepare batter: Preheat oven to 350°F. Spray 10x15-inch baking pan with nonstick spray.

In a large bowl, whisk together pumpkin, oil, eggs and sugars until combined.

In a separate bowl, whisk together flours, baking powder, cinnamon, baking soda, salt, ginger and cloves. Toss in mini chocolate chips and stir to combine. Add dry ingredients to the wet and stir until moistened.

Pour batter into prepared pan coated with nonstick spray. Bake until the center springs back when lightly pressed in the center- about 25 to 30 minutes. Remove and place on wire rack to cool completely.

Prepare frosting: In a large mixing bowl, beat together cream cheese, butter, milk and vanilla. Slowly add the powdered sugar, 1 cup at a time, and mix until smooth. Frost bars and sprinkle with additional mini chocolate chips.


12.22.2014

Holiday Cheer 2014 {2} - Tasty Treats!

Part two of spreading holiday cheer MUST include some tasty treats! Christmas is simply not Christmas without some goodies!

There has been a recipe I've been meaning to share for OVER A YEAR. Gspice always has a potluck at work near the holidays so I decided to make something super festive. If you are in need of a quick, simple and adorable holiday treat, this is a MUST!

Santa Hat Pretzels

*Mini Twist Pretzels
*White Chocolate Almond Bark
*Red Sanding Sugar (I sent Gspice to grab the ingredients for me and this really confused him. It's the colored sugar with the rest of the sprinkles!)
*Mini Marshmallows


Melt the white chocolate almond bark according to the directions on the package.

Dip each mini twist pretzel halfway into the melted white chocolate almond bark.

Dip each almond bark covered pretzel into the red sanding sugar until only a small amount of the almond bark is showing. Place on waxed paper.

Cut the mini marshmallows in half. Use additional melted almond bark to adhere a mini marshmallow half onto the side of each pretzel. Allow time for the almond bark to set.

--

This year included lots of cookies! I thought it might be fun to have a cookie swap with my family in early December. I got really excited and made a fun invitation for it as well. Suffice it to say we had our fair share of cookies for awhile :)


I'd share the recipe I used for the sugar cookies I made but really, they were nothing special and don't look even remotely close to what sugar cookies should look like!

I then attempted another cookie swap the very next day with some Decorah gals. Unfortunately, both my boys were feeling a bit under the weather so it became a very weird and wonky day to try and finish baking off six dozen cookies. I ended up getting them all made but only after the swap had already taken place! Oops! I'm a little bummed out because the cookies I made were so darn delicious. I don't make cookies or bake often so this was a huge win for me :) Also a bummer, I forgot to take a picture of them!

Chocolate Crinkles

1 c unsweetened cocoa powder
2 c sugar
1/2 c vegetable oil
4 eggs
2 t vanilla extract
2 c all purpose flour
2 t baking powder
1/2 t salt
1/2 c powdered sugar for coating

via All Recipes
In a medium bowl, mix together cocoa, sugar and vegetable oil. Beat in eggs one at a time, then stir in the vanilla. In a separate bowl, combine the flour, baking powder and salt; stir into the cocoa mixture. Cover dough, and chill for at least 4 hours.

Preheat oven to 350 degrees F. Line cookie sheets with parchment paper. Roll dough into one inch balls. Coat each ball in powdered sugar before placing onto prepared cookie sheets.

Bake in preheated oven for 10 to 12 minutes. Let stand on the cookie sheet for a minute before transferring to wire racks to cool.

11.23.2014

What's for Dinner {31} - Kale Parsley Pesto (without nuts!)

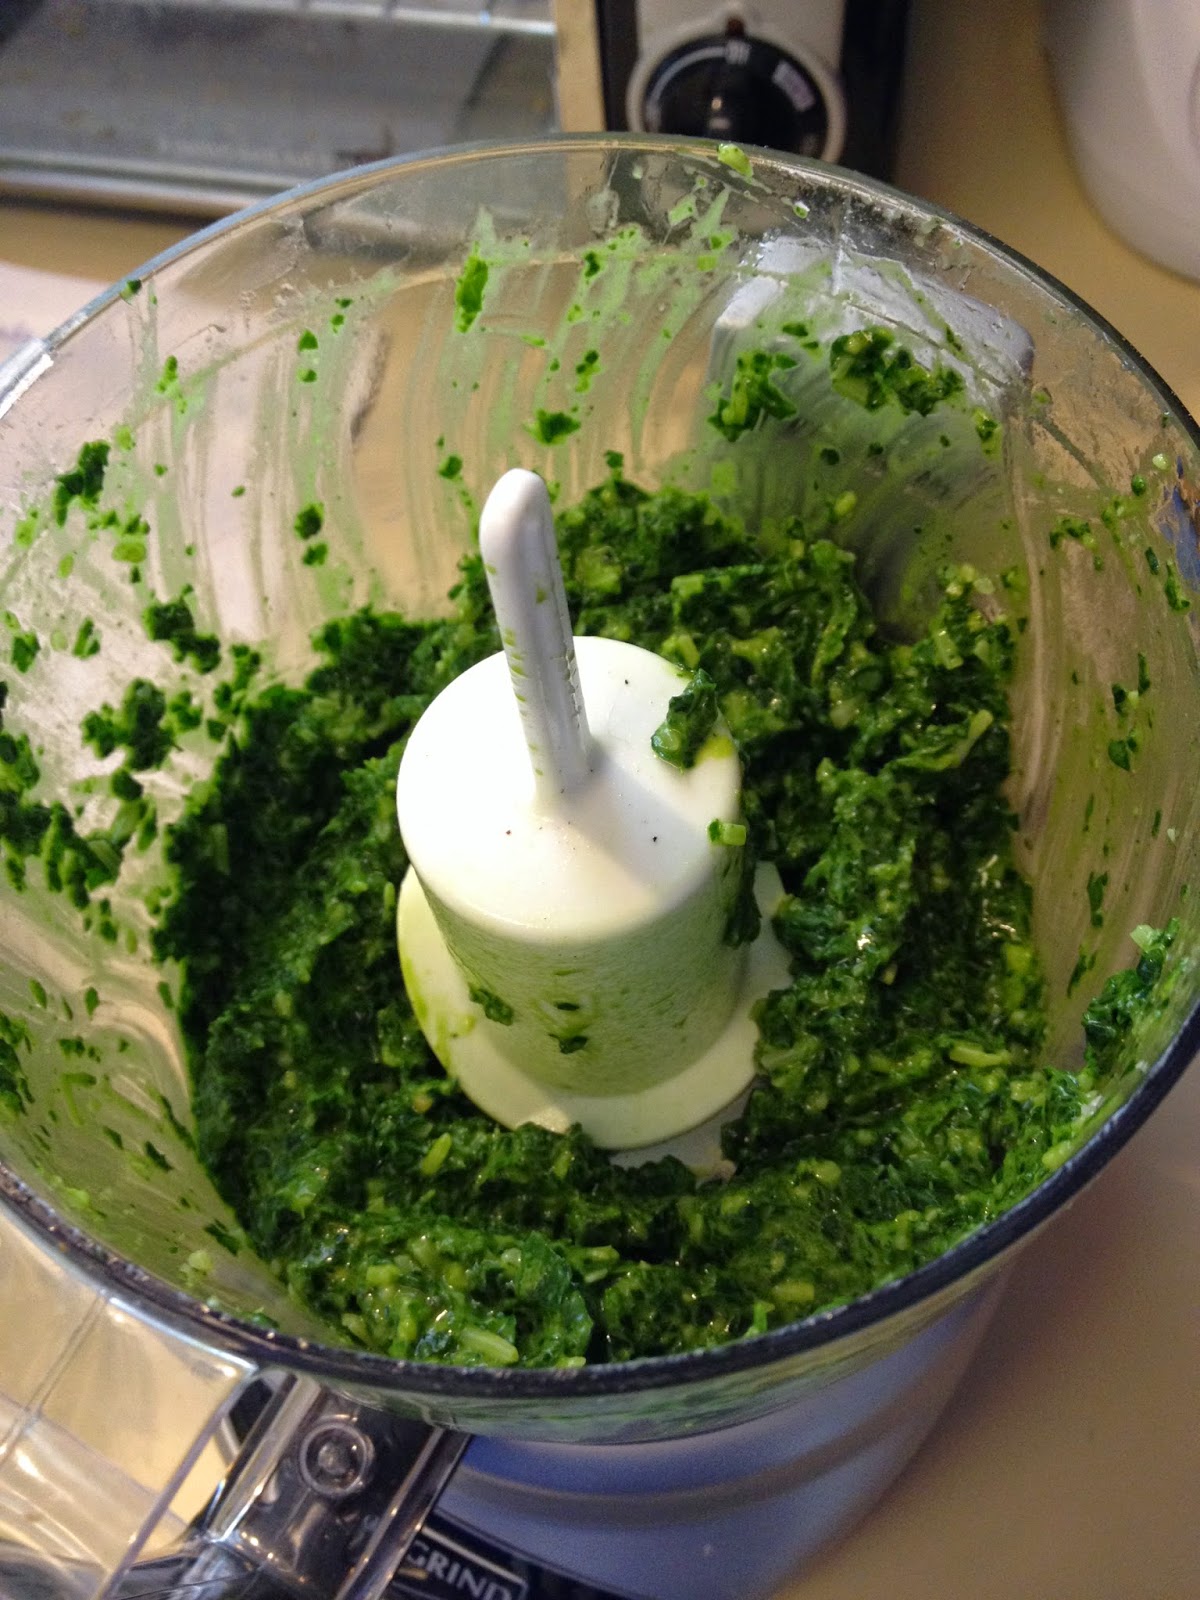
Why did I wait so long to post this recipe? I have absolutely no clue! This is one I shared via instragram more than once and should have put up immediately because it was a huge hit for me this summer. I actually first made a spinach version but decided to use kale for a couple of reasons. It's better for you in some respects and it was more plentiful at the farmer's market. Done and done. One caution - mine didn't turn out super creamy like some pestos which was just fine for me.


Though I'm not 100% certain this is the exact recipe I based my own on, this is a good start to any type of pesto. Choose your green, then the herb, (preferred nut if you wish), and then add in the rest of the ingredients for your perfect pesto!

Kale Parsley Pesto (without nuts!) adapted from the Spinach Basil Pesto by Two Peas and their Pod

4 cups kale,
2 cups flat leaf parsley
2 cloves garlic
1 tablespoon lemon juice
1/4 cup Parmesan cheese
1/2 teaspoon salt
1/2 teaspoon black pepper
1/3 cup olive oil, plus 1 tablespoon

Place the kale, parsley, garlic, garlic, lemon juice, parmesan cheese, salt, and pepper in a food processor or blender. Turn on the machine and blend for 30 seconds. Slowly stream in the olive oil while the machine is running. Process until smooth.

Serve with pasta, veggies, chicken, fish, as a spread, etc. Store the pesto in a jar or container in the fridge for up to 2 weeks. This pesto also freezes well. Enjoy!

Note-if you like a thinner pesto you can add a little more olive oil.

I attempted a couple of times to freeze the pesto but without a ton of luck. If you eat it soon, I'd suggest keeping it in your fridge. I don't tend to eat it all that often so decided to freeze them in little bits wrapped in foil. I'd simply put them in the microwave for a few seconds and then put them in whatever I was cooking - roma tomatoes and/or shrimp. Well on more than one occasion I failed to cook it properly. I think once it got too hot it lost a lot of moisture. It just stuck to the noodles and became inedible pretty quickly. I either need the pesto to be a bit more creamy or be more careful when cooking it. I also read somewhere that to freeze it without the cheese may be wise as well.

11.05.2014

What's for Dinner {30} - Rosemary Herbed Pork Chops with Shallot Wine Sauce

It has been quite awhile since I've posted a What's for Dinner post! To be real, it's because I was barely cooking a dinner for us to be worth sharing. For months there were no new recipes tried, no looking up fun ideas on Pinterest....NOTHING. But alas, I have come back to life! I recently got back in the groove of menu planning and for the first time ever, we've done a decent job sticking to it! So look forward to quite a few new recipes in the coming weeks and possibly months - you know me, I'm not always completely on top of this blog thing :)

I'll start with the fact that this was not a big hit with Gspice. He alerted me afterwards that he's not a big huge-chunk-of-meat person. Um, what? Who did I marry? I say BRING ON THE MEAT! Gary was ready to throw out pork from our diet completely! I got a little worked up because I have a love affair with pork.

Let me ride off on a tangent for a moment - I attended a really nice winter wedding in Chicago back in 2009 with this lovely brood...


At this wedding was the best pork I have ever had. I was so obsessed, I asked for their business card. One day I wanted to have them cater one of my events. I'd hold an event in Chicago simply to have that pork again. Don't believe me? Look at how they presented and served the big cuts of meat!


Then came a few too many vodka cranberries for the both of us....


We both got pretty sick which was NO good - a topic that Andrew's parents will probably never let us live down. I don't mind - it's such a fun memory :)

As you can guess, I've wanted this meat to be a staple ever since. It never has been because I'm still terribly intimidated by it. I told Gspice that we should stick to a more tender cut so we haven't thrown in the towel just yet.

I, however, really liked this dish. And to me, that's why it's worth sharing!


Rosemary Herbed Pork Chops with Shallot Wine Sauce from Bam's Kitchen
*2 tender thick cut pork chops (I used bone-in pork chops)
*1 T olive oil
*1 1/2 T rosemary, freshly chopped
*2 t Seasonings (dried onion, salt, garlic, crushed red pepper flakes, orange zest and paprika)
*1 c whole unpeeled mini onions (I quartered whatever onions I had - shallots and odd shaped white onions I got from the Farmer's Market)
*1 c white wine (1/2 for roasting and 1/2 for sauce)
*1/2 c water
*S&P to taste
*1 T butter


Pre-heat oven to  375 F.

Rub your pork chops with olive oil on both sides. Season pork chops with fresh rosemary and seasoning mixture. Heat up an oven-proof skillet or pan to a medium-high heat and sear for just a minute or two on both sides of seasoned pork chops. Remove from heat.

Next, add 1/2 cup of wine and onions. Bake your pork chops uncovered for about 25-30 minutes or until the internal temperature of at least 145 degrees F or 160 F if you like well done, depending on how thick your pork chops are.

Remove your pork chops for the pan and rest covered for 5 minutes. (Do not wash the pan that you cooked the pork chops in.) Instead place the pan you cooked your pork chops in over medium heat. Add wine to deglaze the pan.  Add water. Chop up a few of the caramelized mini onions (shallots) and add to the wine sauce. Allow the wine sauce to reduce to about 1/2. Season with salt and pepper. Turn off the burner and add a tablespoon of butter to finish the shallot wine sauce.

Serve pork chops with a drizzle of shallot wine sauce on top. Enjoy!

6.29.2014

DIY Bedroom Art


This is the real-life story of a DIY project of epic procrastination.

I had my eye on this particular project for quite awhile. Problem was, I could only find this particular image but no supporting details from its original location (you know, like within someone else's blog and such). Without the instructions I was a little nervous to try this out myself. I am soooo not a fly-by-the-seat -of-your-pants type of person. I love instructions. Detailed, numbered, listed instructions. With none, I just let the idea roll around in my head for well over a year.
Then, during one of my "let's be crafty and productive" shopping trips to Wal-Mart six to eight months ago, I grabbed 4 - 11x14 canvases and a crap ton of blue and white acrylic paint. I determined that the 11x14 was a little too big so again, I just sat on the project.

Then, on another one of my "let's be crafty and productive" shopping trips to Wal-Mart four to five months ago, I grabbed the 8x10 canvases and the rest of the supplies I needed. After determining these were a perfect fit, I let the project sit a little longer for no reason whatsoever.

A month later, I finally got down to business (with a busy boy to care for, my "let's be crafty and productive" bits don't come around too often!). I was nervous to paint the letters but it wasn't too difficult and am quite pleased with how this step turned out! First, I painted three coats of blue. Then, I painted the letters free form so if I can do it, so can you! I also painted the sides to make it look continuous (if you look at it on an angle - check out my final pic below). One thing you don't need to do is buy so many little bottles. I completed everything with one bottle of blue and one bottle of white. My bad!


The next step was to attach the hanging pieces. The instructions I had for that made it seem WAY easier than it actually was. I should have been able to twist the eyehooks in myself. Yeah, right! Three weeks after that, I was visiting my parents and decided I needed my dad's help to get this part done. Out came his handy dandy electric drill to save the day! I was able to twist the eyehooks in and attach the hanging wire easily after that. Thanks, Dad!


And now, here we are, nearly two full years later, I've finally hung up these bad boys to their rightful home. I am not so proud of my productivity to actually finish this rather simple project but quite pleased with how it turned out. Couple this new bedroom art with new bedding AND a completely painted-all-by-myself ceiling....This is much better than how this room started! (I should mention that way back when we painted our living room in December 2012, we also painted our bedroom a beige color to match every single other room in the upstairs - not sure why we did that, but oh well!)


I have dreams of adding in a small gallery wall in this large open space to the right of this picture. Given my track record, I'm sure this will be completed in a couple years or more but I've already drawn up a plan and figured out which photos I want to use. That's something right?!

4.28.2014

What's for Dinner {25} - Chicken Pot Pie

While babysitting one time, my mom had a few recipes to make for an upcoming event. One of those recipes left me with enough ingredients for what I planned to make - chicken noodle soup. However, I asked Gspice what he might want and it wasn't chicken noodle soup. It was something much more difficult that I was much more afraid to make - chicken pot pie.

Insert a few days of semi-panic feelings here.

Then, when I decided it was probably the last possible day I could use all those ingredients (carrots, onion, celery, chicken, homemade chicken broth) before they went bad/dry, I dived right in. I was really concerned because I still have not yet made a proper roux or bechmel sauce. This was no exception. I was convinced even after putting it in the freezer to make on another day that Gary would not touch it. Why? What was to be lovely creamy pie filling was nothing but soup and the pie crust I put on the bottom was way too small. I could hardly get the two to even close together so nothing would come spilling.

Insert another few days of semi-panic feelings here.

Finally, on April 3, I mustered up the courage to pull it out of the freezer. My bad for not taking it out sooner because it took a really long time to bake. But, much to my surprise, it was absolutely delicious. We even went back for seconds but then soon realized our eyes were bigger than our stomachs...oops.

Glad to put this in the success column!

Chicken Pot Pie adapted from Comfortably Domestic

*2 store-bought, refrigerated pie crusts - I used Pillsbury. Who knew they made these?? Love!
*1 T olive oil
*½ c freshly minced onion
*1 ¼ c thinly sliced carrots
*½ c thinly sliced celery stalks
*2 c red potatoes, cubed (per Gary's request of course)
*Kosher salt and black pepper to taste
*2 c boneless, skinless chicken, cooked and shredded (I may have used more...)
*4 T unsalted butter
*½ c all-purpose flour
*1 ½ c milk
*2 c chicken stock (I used my mom's homemade broth instead)
*½ t dried thyme
*1 c frozen peas, thawed (Gary REFUSED to eat the pie if I added this. So I didn't :( )
Preheat the oven to 400 degrees F.

In a large Dutch oven or sauce pan, heat the olive oil over medium-high heat. Sauté the onion, carrots, potatoes and celery in the pan until soft, but not brown. (About 5 minutes.) Season to taste with salt and pepper.

While the vegetables are softening, shred the cooked chicken. Set the shredded chicken aside in a large bowl.

Use a slotted spoon to remove vegetables from the pan, placing them in the bowl with the shredded chicken; set aside.

Heat the butter in the now empty pan (still over medium-high heat.) The butter will foam as it melts. Once the foaming stops, whisk in the flour. Cook the flour/butter for one minute…whisking constantly. Pour in the milk and chicken stock. Continue to whisk until smooth. Add the thyme. Reduce heat to medium-low, and simmer until sauce fully thickens…stirring constantly. (About 1-2 minutes.) ** this is where I failed but kept going...

Taste sauce and adjust salt & pepper, to taste.

Pour sauce over chicken and vegetables in the large bowl; stir to combine.

Roll half of the Pillsbury pie crust on a lightly floured surface into a circle, 12-inches in diameter. **I missed this step entirely!

Gently roll the dough/pastry around the rolling pin to transfer to a 10-inch pie plate. Check that dough is fully touching the bottom and sides of the pie plate. ** Mine was not :) Spoon the warm filling into the pastry lined pie plate.

Roll the other half of the pie crust into a 12-inch circle. Roll the circle around the rolling pin, and transfer it to cover the top of the filled pie. Trim the edges of the pastry, and then fold & crimp the edges. Cut vent slits in the top of the pie. ** Notice my lovely hack job. Brush top with egg wash, if desired.

Bake until crust is fully cooked, top and bottom, and a deep golden brown; about 35-40 minutes. (If edges become too dark, cover with aluminum foil and continue baking until pie is done.)

Instagram comment: My very first attempt at making chicken pot pie. I'm scared...

Let pie rest for 10 minutes before serving.

Instagram comment: Gspice, the pickiest eater I know, gave this an 8. I'll take it

4.24.2014

What's for Dinner {24} - Creamy Ham & Noodle Casserole

I decided Easter was the perfect time for me to try making my first ham ever. And boy, was it pretty darn easy. I have to thank my parents for letting us use their roaster, which we don't have, and their nice oven, which we also don't have so I'm sure that made the process a whole lot smoother than it would have gone at our house :) Oh, and thanks for Gspice for helping me out with the honey glaze. He was too jazzed to let me do it. Apparently, I wasn't doing it right...
As proud of myself I am, I wasn't a huge fan of it. I think that was because it was a spiral cut ham and had a little too much fat to pick off for my taste. Though, the ham itself was just fine. Regardless, we came home with a bag full of leftovers. I got it in my head that I wanted to try something else with it and I found this delightful recipe to use up the leftover ham!

Creamy Ham & Noodle Casserole adapted from Mostly Homemade Mom

*2 c cooked ham, chopped
*2 eggs, beaten
*1 c sour cream
*1 1/2 T dried, minced onion
*1 t salt, pepper, basil
*1 c shredded mozzarella cheese (she used swiss but I couldn't find it in the store!)
*12 oz egg noodles, cooked and drained

In a large mixing bowl, whisk eggs and sour cream until smooth. Add ham, minced onion, spices and cheese. Gently fold in egg noodles, turning to coat well.

Transfer to an 8x8 pan or 2 quart baking dish and bake at 350 for 30 minutes. You may need to put foil over it in the last 10 minutes to prevent edges from getting too brown.

It was sooooo good.


Next time, I'll try making double the recipe and freezing the 2nd pan. Yay for using up leftover ham!!

4.13.2014

What's for Dinner {23} - Spicy Turkey Sausage

Ok, so I didn't have this for dinner but I know that one day it will and we won't ever look back. This was perhaps one of the easiest tasty things I have ever made and can't wait to try it with breakfast, with pasta dishes, on pizza - you name it! I just finished the last of what I froze for future breakfast treats and I must say, I was really disappointed. Can't wait to make them again!

Spicy Turkey Sausage from Our Family Eats

*1 pound ground turkey
*1/2 teaspoon cayenne pepper (or to taste)
*1/4 teaspoon oregano (or to taste)
*1/8 teaspoon pepper
*pinch of salt
*add 1/2 teaspoon of any of the following according to your preference:
    --crushed red pepper flakes
    --parsley
    --thyme
    --basil
    --minced garlic
 
In a medium sized mixing bowl mix together turkey and spices with your hands until spices are distributed evenly.  


Divide mixture into 12 evenly sized patties.


Heat 1 tablespoon olive oil in a non-stick skillet.  Add patties and cook about 3 minutes on each side, or until no longer pink.
 
To Freeze: Wrap pre-made patties tightly in plastic wrap and freeze for a quick breakfast later.  Just pop fully cooked patties in the microwave on medium heat for 30 seconds to 1 minute, or until hot.

3.26.2014

What's for Dinner {22} - Sexy Pork Chops

I wouldn't necessarily call these chops sexy but I couldn't help but keep up the tradition from whose recipe I followed. They were pretty good looking...


Gary and I don't make pork often. I can't even remember the last time we did. Why, I really have no idea. For whatever reason I feel like it's a "special occasion" type of meat. After this recipe, that's going to change. I definitely want it more often than that! One thing I do suggest is to have a meat thermometer handy. That is the true way to insure you've cooked it to your liking. Otherwise, I'm 100% sure I would've seriously under or overcooked the meat.

Like I mentioned before, pork is a special occasion meat. My special occasion this time? My mom was in town to babysit Owen AND Bridget was coming up to join me for the awesome Pentatonix concert at Luther. I wanted to treat them to a nice meal while in town and I think it was a hit! I was a little rushed so I forgot to take any pictures. Next time!


Sexy Pork Chops aka Sautéed Pork Chops with Lemon-Garlic Sauce from The Mountain Kitchen

Sexy Pork Chops: TheMountainKitchen.wordpress.comIngredients:

*(4) 1″ thick Pork Chops
*salt & pepper
*2 tsp olive oil, divided
*2 cloves garlic, minced
*1/2 c white wine
*1/2 c low-sodium chicken broth
*grated lemon zest and 1 T lemon juice from one lemon
*1 T chopped fresh parsley
*1 tsp chopped fresh rosemary

Directions
Sprinkle pork with salt and pepper. Heat 1 tsp oil in a large, heavy skillet over medium-high heat. Add pork and cook, turning once, until pork is browned and internal temperature reaches 145˚F. Transfer pork to serving platter and cover to keep warm.

Add remaining tsp of oil to skillet. Add garlic and cook, stirring constantly, until garlic is fragrant, about 30 seconds. Add wine and broth. Increase heat to high and cook, stirring to scrape up browned bits from bottom of the skillet, until liquid is reduced by two thirds, about 5 minutes.

Remove skillet from heat and stir in a little salt and pepper, lemon zest and juice, and herbs. Serve pork chops drizzled with sauce.

3.23.2014

Freezer Meals {1}

For some time now, I've thought about venturing into the world of freezer meals. I must admit, I was initially super intimated. It seemed like a lot of work, our freezer is the size of a shoebox and Gary isn't a huge fan of "leftovers". Any meal that is made and then frozen qualifies as leftovers. Regardless of my fears, I decided to venture on.

After taking an entire week to compile tons of recipes and then to choose which four I wanted to make, I spent a total of five hours last Saturday shopping for and making a whopping 37 servings of recipes. I ended up using four recipes and added one bonus recipe with the leftover chicken. I'll explain later.

37 servings  |  $1.90 each  |  WORTH IT


Slow Cooker Honey Mustard Chicken
6 skinless, boneless chicken breast halves
salt and pepper to taste
1/2 cup honey
1/2 cup prepared mustard
1 teaspoon dried basil
1 teaspoon paprika
1/2 teaspoon dried parsley


Combine all ingredients in freezer bag and freeze.

Place ingredients in slow cooker, cover and cook on low for 6-8 hours. Makes 6 servings.


Parmesan Garlic Chicken
6 chicken breasts (we had one extra)
1 cup parmesan cheese
1 envelope Italian salad dressing mix
2 cloves of garlic, minced
1/2 cup olive oil


Mix together cheese, garlic, and dressing mix. Dip chicken breasts into olive oil, then coat with cheese mixture. Place in freezer bag and store.

To serve, thaw completely. Bake at 400 degrees for 45-60 minutes. Makes 7 servings.


Mediterranean Pork Chops
1/4 cup olive oil
2 cups chick broth
4 cloves of garlic
2 tbsp paprika
2 tbsp poultry seasoning
2 tsp dried oregano
2 tsp dried basil
8 thick cut pork chops


Split all ingredients into two bags. 

To serve, cook on low for 8 hours.  Serve with salad and rice or noodles. Makes 8 servings.


Baked Ziti
1 pound dry ziti pasta (or really any kind of pasta would work- I actually used Penne pasta)
1 onion, chopped
1 pound lean ground beef (season with pepper, garlic powder, onion powder, and minced garlic)
2 (26 ounce) jars spaghetti sauce (I added a zucchini to my sauce just for more veggies!)
8 slices provolone cheese
1 1/2 cups sour cream
6 ounces mozzarella cheese, shredded
2 tablespoons grated Parmesan cheese


Bring a large pot of lightly salted water to a boil. Add ziti pasta, and cook until al dente, about 7-8 minutes; drain.

In a large skillet, brown onion and ground beef over medium heat. Add spaghetti sauce, and simmer 15 minutes. When pasta is ready, mix in to the sauce.

Preheat the oven to 350 degrees F (175 degrees C). Spray 2 8x8 inch pans with non-stick cooking spray. Layer as follows in each pan: 1/4 of the pasta/sauce mixture, 4 slices of Provolone cheese, 1/2 of sour cream,  1/4 of pasta/sauce mixture,  1/4 mozzarella cheese. Top with grated Parmesan cheese.

Bake covered for 30 minutes in the preheated oven, or until cheeses are melted.

To freeze this meal: Follow the instructions above, except for the last step of cooking it. Cover the assembled ziti with foil and stick in the freezer (I usually use 2-3 layers of foil just to keep out the freezer burn). It will last in the freezer for about 30 days. When you are ready to eat it, remove from the freezer and place in the fridge to thaw 24 hours in advance. By allowing it to thaw in the fridge, you can cook it at the regular time and temperature (350 degrees for about 30 minutes). If you do not thaw it in advance, it will take much longer to cook. If you cook it completely frozen, it will take anywhere from 90 minutes - 2 hours to cook all the way through.

You can eat one for dinner now and freeze the other for dinner another day! This is precisely what we did!


BONUS!
If you happen to cut chicken like I do, you'll end up with a heaping pile of extra pieces of chicken that are better cut into smaller pieces. We tend to use these as ingredients for paninis or tacos. In this instance, it created 8 bonus servings! WOAH. For those that don't know, I have to cut every piece of fat I can find from each piece before eating it. That tends to mean I have one more appropriately-sized serving and another thin strip as extra. And here is what we made with the bonus servings!
Stubbs Marinated Chicken
extra chicken, cut into smaller pieces (I had enough for 8 servings)
your favorite Stubbs Marinade (whole bottle)


Combine ingredients into two bags. We had enough for four sandwiches or tacos in each bag.

To serve, thaw completed overnight. Cook and then make paninis or tacos.